If you need your wet footwear dry and fresh for the next morning, we’ve got the answers. This guide will tell you how to accelerate the boot dying process, but will also give you some tips on how to prevent damage and avoid build-up of bacteria and odour. Let’s get started.
PREPARING YOUR BOOTS FOR THE DRYING PROCESS
STEP 1: REMOVE THE DIRT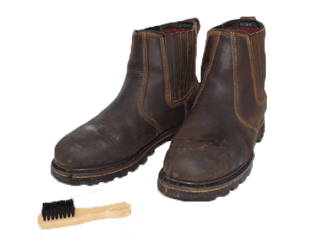
Starting off, it’s important to remove any dirt, muck or other contaminates from the surface of your boot. If you don’t, your boots will be at risk of getting permanently stained or discoloured. Use soapy water to remove the dirt, then towel-dry. If you're using a brush, make sure it’s soft bristled to avoid scratching the leather.
AVOID: DETERGENTS OR CHEMICALS
Using strong cleaning detergents containing chemicals or alcohol will damage and discolour boots. Keep it simple: soap and water only!
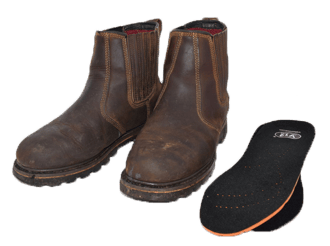
STEP 2: REMOVE THE INSOLES
If you have removable insoles, take them out of your safety boots and place them aside to dry. This will allow air to flow into the insole itself, drying them more quickly and reducing potential odour. Removing the insoles will also allow the air to circulate in and around areas of the boot that don’t normally get aired, again reducing the chances of unwanted odour and bacteria build-up.
Optional step – remove the laces
Some people also take the laces out before drying, which allows air to flow more freely throughout smaller, less exposed areas of the boot, and also enables the laces themselves to dry more easily. However, if you’ve got a hi-leg boot and not a lot of time, this isn’t an essential step, because taking them off and putting them back on will add on a fair few minutes to the process.
DRYING YOUR WORK BOOTS
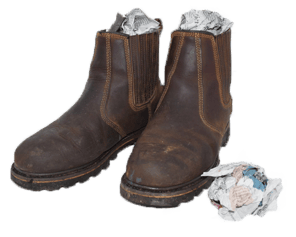 STUFF WITH NEWSPAPER
Using newspaper is an efficient method to dry boots without stressing the material, as it absorbs the moisture naturally.
Ball up some sheets of newspaper loosely (don't scrunch them too tight as they won't absorb as much moisture) then place them inside of the boot.
Avoid: Direct heat
We’re all busy and want quick results - but putting your boots next to a fire or heater is a BIG MISTAKE. This method might dry the boots quickly, but it will damage them quickly too.
Question: Have you ever had dry and cracked skin?
Well just remember, leather is skin too - and even after it’s processed and made into boots, it still has pores, contains natural oils and reacts badly to high heat - which means it still needs looking after! And when leather is subjected to intense heat, its smoothness and suppleness disappears and becomes brittle and cracked.
Finally, boots aren’t just made of fabric. High heat can melt the glue that holds components together, as well as warping or melting rubber parts such as the sole, so no matter how wet your boots are, always choose a natural, non-aggressive drying method.
Optional step – newspaper alternatives
Fabric materials
You can substitute paper for other fabrics if you think that wet and screwed up newspaper might be harder to recycle. The other advantage of a larger piece of fabric like a towel is that the corners can go into the boot, while the rest of the material can be placed over the top, which dries all of the footwear even more effectively.
Hygroscopic materials
If you’ve ever got your phone wet, someone has probably suggested you put it in a bowl of rice. This is because rice is a hygroscopic material, which means that it naturally absorbs moisture from the air. People who don’t have newspaper have been known to pour uncooked rice into a pair of socks, then insert the socks into the shoes to remove the moisture. There have even been examples of people putting their wet boots in a box or bin full of biscuits, because like rice, they draw moisture in. However, in a world where food shortage affects a third of the population, this method seems rather wasteful - as well as a disgraceful misuse of perfectly good biscuits.
FINAL FOOTWEAR DRYING CHECKLIST ✅
You've got the details - now read these final tips to take your boot drying skills from competent to expert.
DAMP ENVIRONMENT
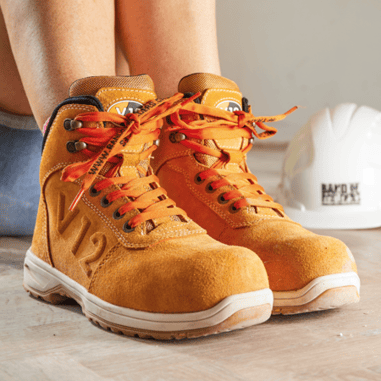 Don’t go to the trouble of preparing everything you need to extract the moisture from your boots, only to put them in a wet room! Rooms in your house which tend to have more moisture in the air include your bathroom and kitchen, so avoid those. If you want dry boots – put them in a dry room!
NOTE - your airing cupboard does not constitute a dry room! Because it is an unusually warm space, this would constitute forced drying and could quickly damage your boots, so keep them out of this area.
CHECK FOR DRYNESS
Even if you’ve taken all of the right steps to dry your boots, make sure you check they are fully dried before you wear them next: moisture around the foot can lead to a range of foot-health issues. Remember – wet feet aren’t just an irritation: they’re a health risk!
And finally...

WATERPROOF OR WATER-RESISTANT?
All of the guidance in this article applies to waterproof and non-waterproof boots, but remember - waterproof boots still shouldn’t ever get wet inside, as the uppers will absorb any water that gets in.
If you’re interested in waterproof and water-resistant boots or want more info on the difference between the two, read our blog.
LOOKING FOR A NEW PAIR OF SAFETY BOOTS?

